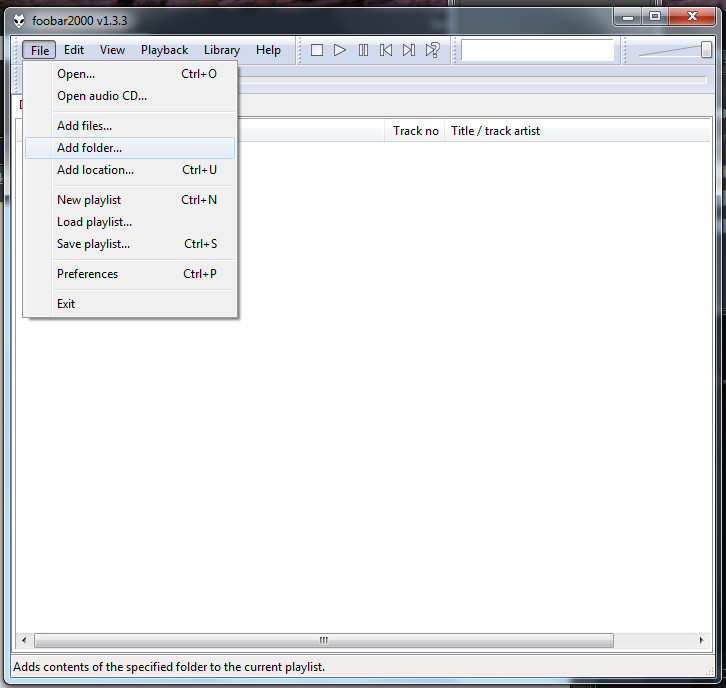
When you open Foobar it is practical to use the command “File – Add folder” when you want to fetch the fies, as we have created a folder for the new recording in the previous step.
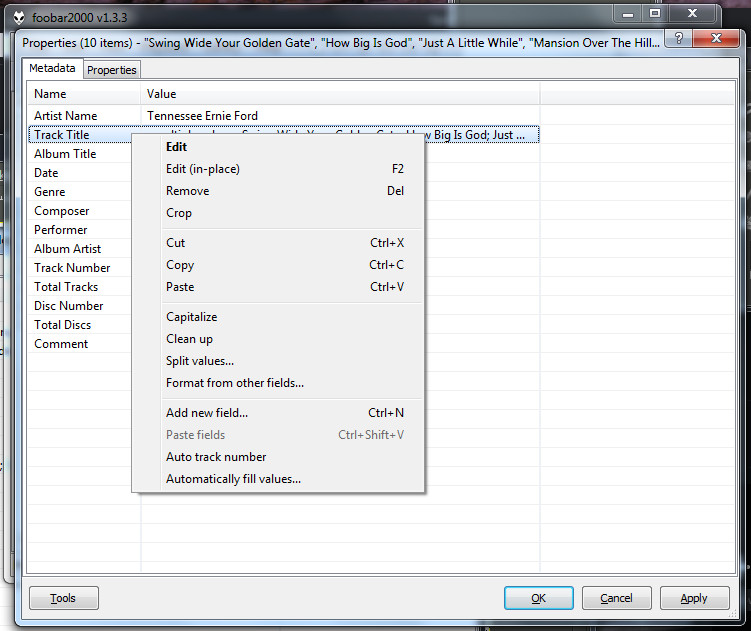
Now I have the files in Foobar and I have marked all tracks. By right-clicking I receive a menu with different options:
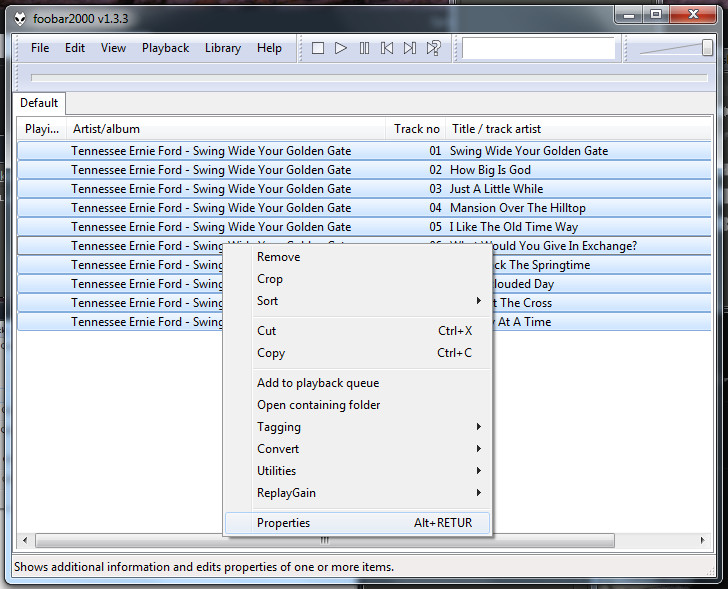
Here I have selected “Properties” and can review and correct the common information (metadata) for all tracks on the album:
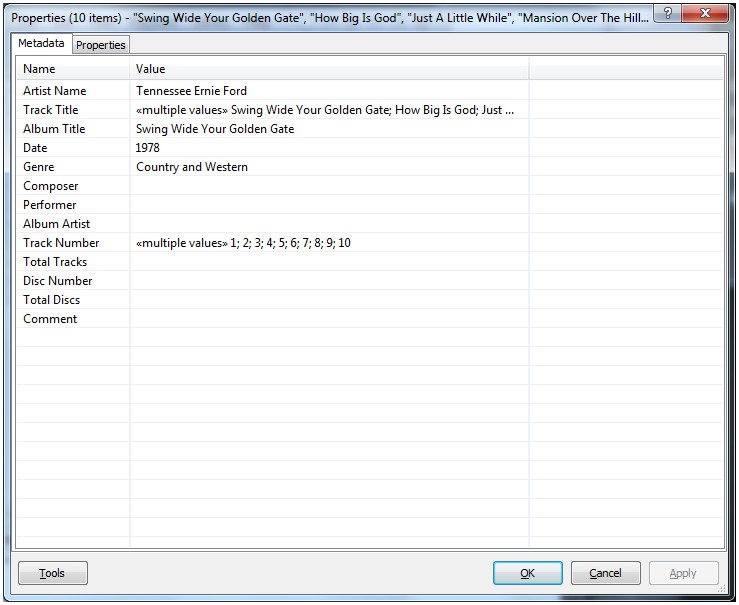
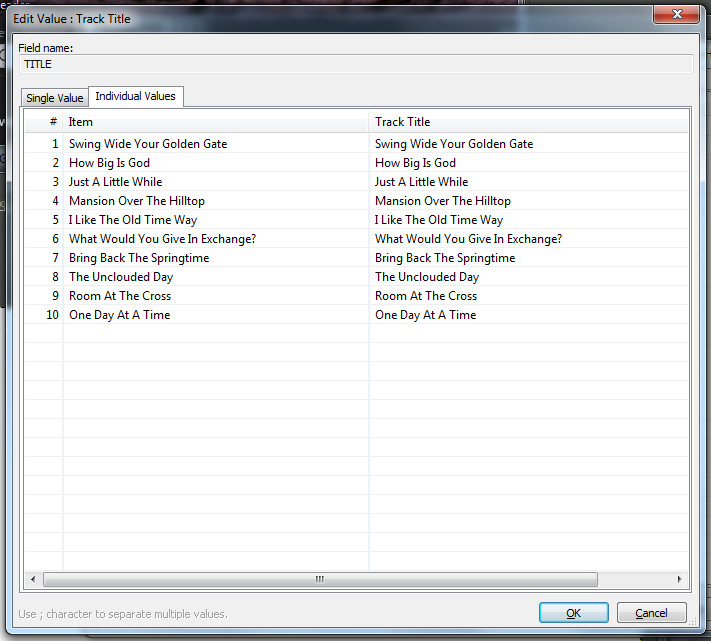
In the field for Track Title you can see the text “multiple values”. If you right-click this field an selects Edit you will receive a list on all tracks.
The list looks like this, and you can edit it if you need to:
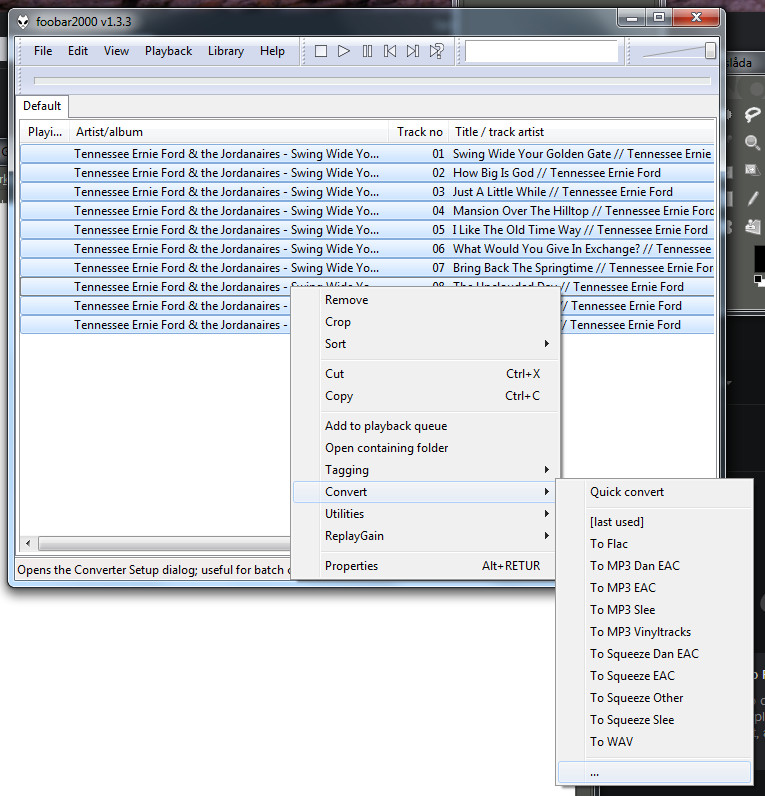
Now it is time to convert to different formats and at the same time store the result where it should be in you music collection.
Right-click the selected tracks and select Convert. Then there is a sub menu with the presets I have created earlier. Now I will select the three dots (…) and can review my settings and possibly create a new one:
Here I have selected one of my “Saved presets” and loaded it:
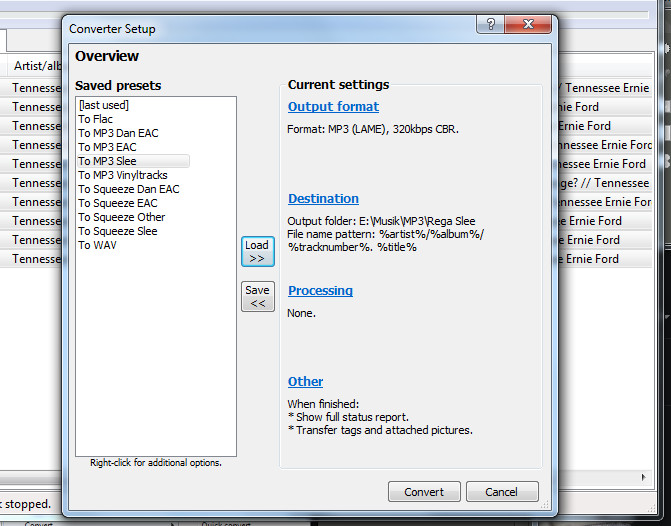
If you click on Output format you will see a list of formats that can be chosen. You can also add new ones.
(For MP3-conversion you have to have LAME installed and the first time you select MP3 you should also enter the location for the LAME modules).
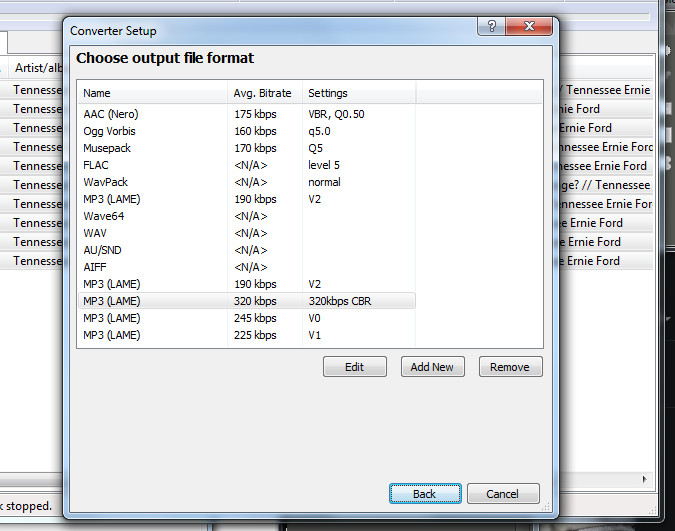
When you click “Back” in this window you will return to the Converion window with the marked settings chosen.
Now you should chose where to store the converted album and and how to name folders and files. Select “Destination”.
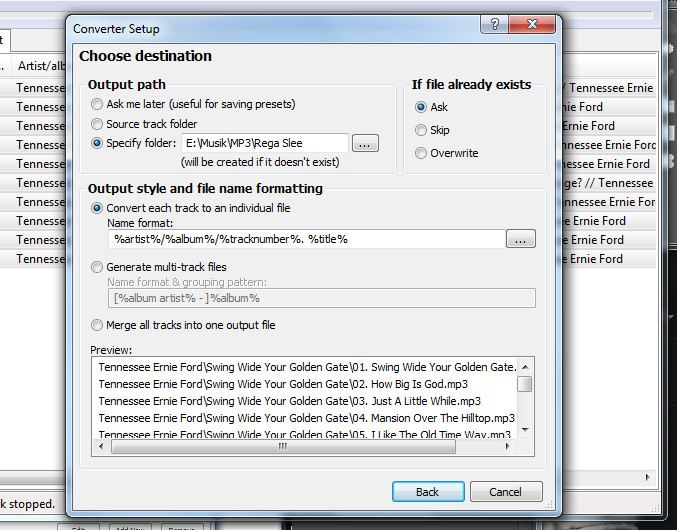
Specify folder: This is the main folder in which all of your conversions to this format should be stored.
Name format (in this example): A folder is created when a metadata field as %artist% and %album% is followed by a slash sign ( / ). The filename is created by the rules after the last slash sign.
In the Preview-field you can see that my settings will give a folder “Tennessee Ernie Ford” with a sub folder “Swing Wide Your Golden Gate”. Each track is named with track number, period, blank, Track name.
Click “Back” when you have done your settings.
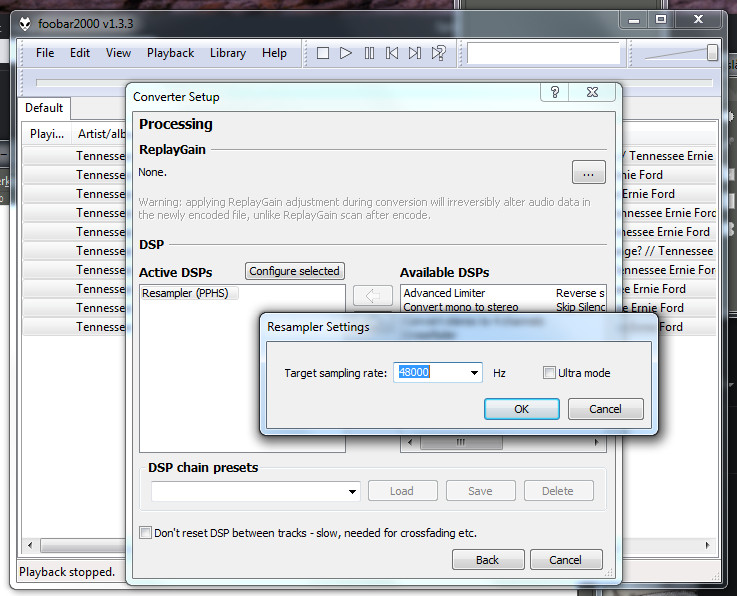
From the Conversion window you can also select “Processing” where you can chose other processing to be done in or before the conversion. DSP stands for Digital Signal Processor. In the example below I have chosen “Resampler” and in “Configure selected” I have chosen Target sampling rate = 48000.
This setting is not relevant for MP3-conversion but I use it for my FLAC files as I (with my current setup) can stream at higher rates than 48 000 Hz.
When you now have verified all settings (and saved them for future use) you can start the conversion.
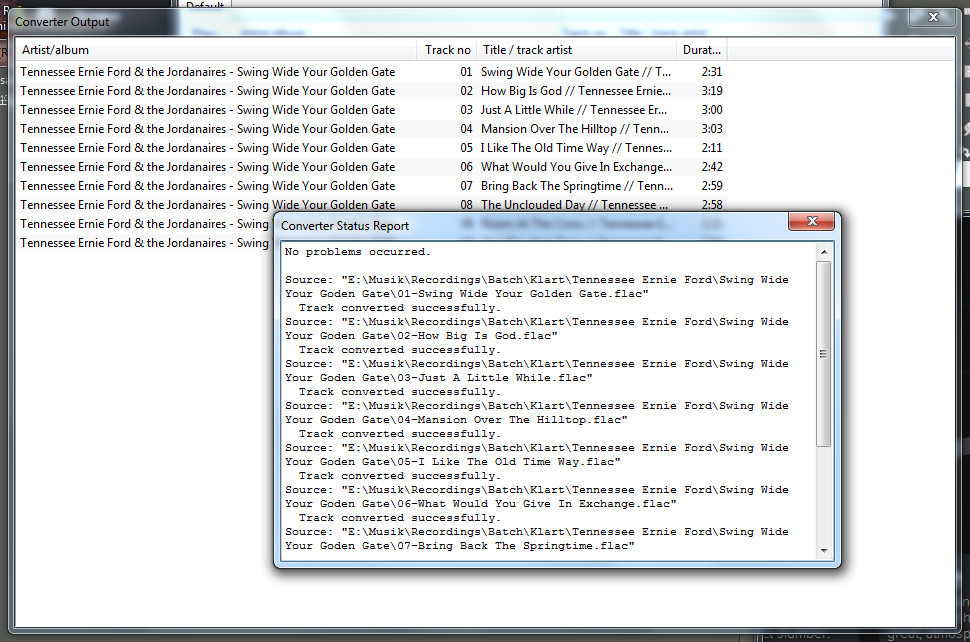
When the conversion is done you will receive two popup windows:
- Converter Status Report – which hopefully states: No problems occurred.
- Converter Output – a window which makes it possible to view and edit the converted files.
Cose both these windows!
(Otherwise you can mistake to the converted files for the original files).
An addition:
From the Foobar main window you can also chose to tag the files with album art. I haven’t tried this. It seems as you have to first save the pictures and then connect them.
Note! If this is a good idea then of course this should be done before you convert to other formats. This activity would then be the first you do in Foobar.
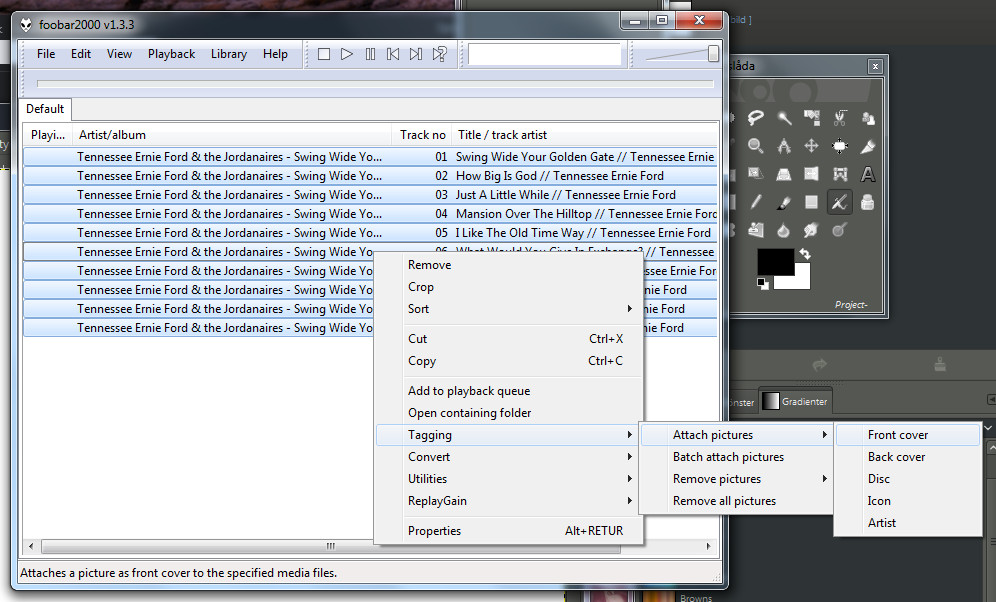
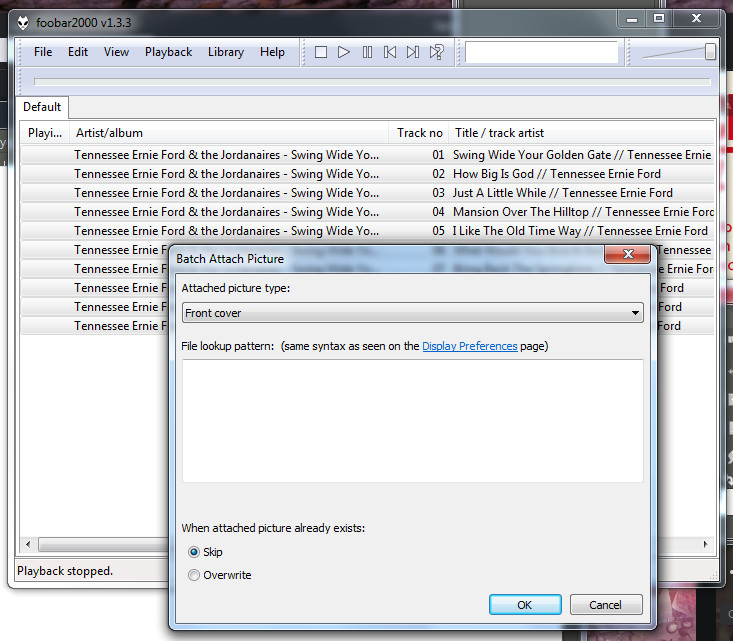
There is a choice “Batch attach picture” which seems to be more advanced. I haven’t tried this either.